みなさんこんにちは。レッドハットの杉村です。Ansible のテクニカルサポートをしています。
東京は桜の開花宣言が出たそうです。わたしは北海道出身なもので桜と言えばゴールデンウィーク明けの感覚なのですが、実家を出て30年くらいになってもまだ慣れないものです。
Ansible Tower は OpenShift にも対応しておりまして、実際に使われているお客様も多くいらっしゃいます。サポートをするためには問題を再現するための検証環境が必要なもので、手元でも OpenShift を動かしたいということで環境構築に悩んでいたのですが、PC 1台の中でフルスペックの OpenShift を構成すると VM を多数作ることになり、リソースが足りないという問題がありました。そもそも OpenShift を構築すること自体もそう簡単ではなく、本来検証したいことができないというのは本末転倒です。
そこで、CRC (Red Hat CodeReady Containers) を利用してみようと思いまして実際に構築してみました。
ドキュメントはこちらです。
以前にもこの赤帽エンジニアブログで田中司恩さんが記事を書かれているので、より詳しくはそちらもご覧ください。
用意したPC
15cm四方くらいの小さいPCを以前買いまして、今回 CRC 用に使うことにしました。だいたい10万円くらいで、ケース全体で熱を放出するために冷却が気になるところですが、音は静かで気に入っています。TOPTON というメーカーのものです。
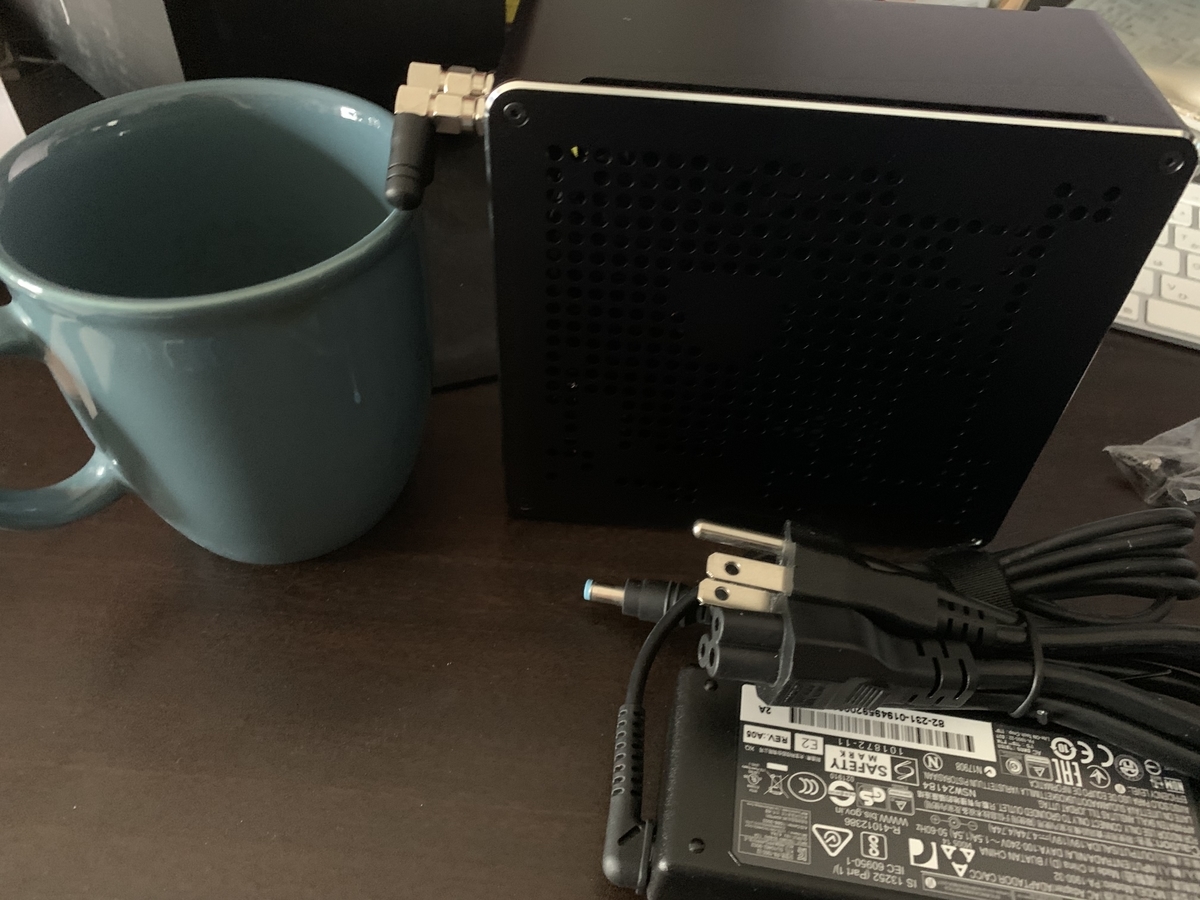
大まかなスペックはこちらです。CRC を動かすためであれば、いま売っているPCであればだいたいなんでも構わないと思います。Ansible Tower を動かすためには、だいたい 6core でメモリは 16GB くらいあれば良さそうです。
- Intel(R) Core(TM) i7-10750H CPU @ 2.60GHz 12core
- 64GB RAM
- 1TB SSD
RHEL 8.3 をインストールしまして、IPアドレスとホスト名を振りました。
- IP address: 192.168.0.6
- hostname: toptonpc.sugimura.home
ホスト名は DNS で解決できるようにしています。DNS は別に検証環境に置いていまして、dnsmasq で構築しています。
この PC の中で、10core 48GB(49152MB) を CRC に使うことにします。
CRC は一般ユーザで動作させる必要があります。sugimura ユーザを作りまして、sudo できるようにしておきます。
これでインストールするための準備ができたので、早速進めていきます。
CRC の制限
CRC は OpenShift をフルスペックでインストールするのと比べまして、いくつかの制限があります。
- machine-config と monitoring の Operator が無効になっています
- master と worker が同居する1台構成になっており、アップデートなどはできません
- ドメインが crc.testing 固定です
- 内部で使うIPアドレスは変更することができません
CRC のインストール
CRC は弊社のサイトから配布しています。こちらに Red Hat のアカウントでログインしてください。

CodeReady Containers archive で Linux を選択して、ダウンロードします。Pull secret もダウンロードして、適当なファイル名で保存しておきます。 この2つのファイルをダウンロードできたら、RHEL に転送します。
- crc-linux-amd64.tar.xz
- pull-secret.json
tar を展開します。2021年3月14日の時点では、CRC のバージョンは 1.23.1 でした。
[sugimura@toptonpc ~]$ tar xvf crc-linux-amd64.tar.xz
crc-linux-1.23.1-amd64/
crc-linux-1.23.1-amd64/LICENSE
crc-linux-1.23.1-amd64/doc.pdf
crc-linux-1.23.1-amd64/crc
[sugimura@toptonpc ~]$ cd crc-linux-1.23.1-amd64/
[sugimura@toptonpc crc-linux-1.23.1-amd64]$
この crc コマンドを使うことで CRC 用の VM が起動されて設定などがされるのですが、この VM についての設定をあらかじめしておきます。初期値では 4 CPU と 9GB RAM に設定されているので、その値を変えておきます。DNS はわたしの検証環境では 192.168.0.93 です。
[sugimura@toptonpc crc-linux-1.23.1-amd64]$ ./crc config set cpus 10
[sugimura@toptonpc crc-linux-1.23.1-amd64]$ ./crc config set memory 49152
[sugimura@toptonpc crc-linux-1.23.1-amd64]$ ./crc config set pull-secret-file /home/sugimura/pull-secret.json
[sugimura@toptonpc crc-linux-1.23.1-amd64]$ ./crc config set nameserver 192.168.0.93
設定できたら ./crc setup を実行します。使用状況を送信するかどうかと sudo のパスワードを聞かれますが、適切に回答して進めてください。
[sugimura@toptonpc crc-linux-1.23.1-amd64]$ ./crc setup
CodeReady Containers is constantly improving and we would like to know more about usage (more details at https://developers.redhat.com/article/tool-data-collection)
Your preference can be changed manually if desired using 'crc config set consent-telemetry <yes/no>'
Would you like to contribute anonymous usage statistics? [y/N]:
No worry, you can still enable telemetry manually with the command 'crc config set consent-telemetry yes'.
INFO Checking if running as non-root
INFO Checking if podman remote executable is cached
INFO Checking if admin-helper executable is cached
INFO Caching admin-helper executable
INFO Using root access: Changing ownership of /home/sugimura/.crc/bin/admin-helper-linux
[sudo] sugimura のパスワード:
INFO Using root access: Setting suid for /home/sugimura/.crc/bin/admin-helper-linux
INFO Checking minimum RAM requirements
INFO Checking if Virtualization is enabled
INFO Checking if KVM is enabled
INFO Checking if libvirt is installed
INFO Installing libvirt service and dependencies
INFO Using root access: Installing virtualization packages
INFO Checking if user is part of libvirt group
INFO Adding user to libvirt group
INFO Using root access: Adding user to the libvirt group
INFO Checking if libvirt daemon is running
WARN No active (running) libvirtd systemd unit could be found - make sure one of libvirt systemd units is enabled so that it's autostarted at boot time.
INFO Starting libvirt service
INFO Using root access: Executing systemctl daemon-reload command
INFO Using root access: Executing systemctl start libvirtd
INFO Checking if a supported libvirt version is installed
INFO Checking if crc-driver-libvirt is installed
INFO Installing crc-driver-libvirt
INFO Checking if systemd-networkd is running
INFO Checking if NetworkManager is installed
INFO Checking if NetworkManager service is running
INFO Checking if /etc/NetworkManager/conf.d/crc-nm-dnsmasq.conf exists
INFO Writing Network Manager config for crc
INFO Using root access: Writing NetworkManager configuration to /etc/NetworkManager/conf.d/crc-nm-dnsmasq.conf
INFO Using root access: Changing permissions for /etc/NetworkManager/conf.d/crc-nm-dnsmasq.conf to 644
INFO Using root access: Executing systemctl daemon-reload command
INFO Using root access: Executing systemctl reload NetworkManager
INFO Checking if /etc/NetworkManager/dnsmasq.d/crc.conf exists
INFO Writing dnsmasq config for crc
INFO Using root access: Writing NetworkManager configuration to /etc/NetworkManager/dnsmasq.d/crc.conf
INFO Using root access: Changing permissions for /etc/NetworkManager/dnsmasq.d/crc.conf to 644
INFO Using root access: Executing systemctl daemon-reload command
INFO Using root access: Executing systemctl reload NetworkManager
INFO Checking if libvirt 'crc' network is available
INFO Setting up libvirt 'crc' network
INFO Checking if libvirt 'crc' network is active
INFO Starting libvirt 'crc' network
INFO Checking if CRC bundle is extracted in '$HOME/.crc'
INFO Checking if /home/sugimura/.crc/cache/crc_libvirt_4.7.0.crcbundle exists
INFO Extracting bundle from the CRC executable
INFO Ensuring directory /home/sugimura/.crc/cache exists
INFO Extracting embedded bundle crc_libvirt_4.7.0.crcbundle to /home/sugimura/.crc/cache
INFO Uncompressing crc_libvirt_4.7.0.crcbundle
crc.qcow2: 9.97 GiB / 9.97 GiB [-----------------------------------------------------------------------------------------------------------------------------] 100.00%
Setup is complete, you can now run 'crc start' to start the OpenShift cluster
WARN が一つ出たので一応確認しておきます。この CRC は KVM で動作しまして、そのためのサービス libvirtd が有効になっていないと起動しませんよということです。
[sugimura@toptonpc crc-linux-1.23.1-amd64]$ sudo systemctl list-unit-files | grep libvirtd.service
libvirtd.service                           enabled
setup が無事終わったので、./crc start で起動します。
[sugimura@toptonpc crc-linux-1.23.1-amd64]$ ./crc start
INFO Checking if running as non-root
INFO Checking if podman remote executable is cached
INFO Checking if admin-helper executable is cached
INFO Checking minimum RAM requirements
INFO Checking if Virtualization is enabled
INFO Checking if KVM is enabled
INFO Checking if libvirt is installed
INFO Checking if user is part of libvirt group
INFO Checking if libvirt daemon is running
INFO Checking if a supported libvirt version is installed
INFO Checking if crc-driver-libvirt is installed
INFO Checking if systemd-networkd is running
INFO Checking if NetworkManager is installed
INFO Checking if NetworkManager service is running
INFO Checking if /etc/NetworkManager/conf.d/crc-nm-dnsmasq.conf exists
INFO Checking if /etc/NetworkManager/dnsmasq.d/crc.conf exists
INFO Checking if libvirt 'crc' network is available
INFO Checking if libvirt 'crc' network is active
INFO Loading bundle: crc_libvirt_4.7.0.crcbundle ...
INFO Creating CodeReady Containers VM for OpenShift 4.7.0...
INFO CodeReady Containers VM is running
INFO Generating new SSH Key pair ...
INFO Updating authorized keys ...
INFO Copying kubeconfig file to instance dir ...
INFO Starting network time synchronization in CodeReady Containers VM
INFO Adding 192.168.0.93 as nameserver to the instance ...
INFO Check internal and public DNS query ...
INFO Check DNS query from host ...
INFO Adding user's pull secret to instance disk...
INFO Verifying validity of the kubelet certificates ...
INFO Starting OpenShift kubelet service
INFO Waiting for kube-apiserver availability... [takes around 2min]
INFO Adding user's pull secret to the cluster ...
INFO Updating cluster ID ...
INFO Starting OpenShift cluster ... [waiting for the cluster to stabilize]
INFO 6 operators are progressing: dns, image-registry, network, openshift-controller-manager, operator-lifecycle-manager-packageserver, service-ca
INFO 4 operators are progressing: image-registry, network, openshift-controller-manager, service-ca
INFO 3 operators are progressing: image-registry, openshift-controller-manager, service-ca
INFO 2 operators are progressing: image-registry, openshift-controller-manager
INFO Operator openshift-controller-manager is progressing
INFO 2 operators are progressing: kube-apiserver, openshift-controller-manager
INFO 2 operators are progressing: kube-apiserver, openshift-controller-manager
INFO 2 operators are progressing: kube-apiserver, operator-lifecycle-manager-packageserver
INFO Operator kube-apiserver is progressing
INFO Operator kube-apiserver is progressing
INFO All operators are available. Ensuring stability ...
INFO Operators are stable (2/3) ...
INFO Operators are stable (3/3) ...
INFO Updating kubeconfig
WARN The cluster might report a degraded or error state. This is expected since several operators have been disabled to lower the resource usage. For more information, please consult the documentation
Started the OpenShift cluster.

The server is accessible via web console at:
  https://console-openshift-console.apps-crc.testing

Log in as administrator:
  Username: kubeadmin
  Password: XXXXXXXXXXXXXXXXXXXXXX

Log in as user:
  Username: developer
  Password: developer

Use the 'oc' command line interface:
  $ eval $(crc oc-env)
  $ oc login -u developer https://api.crc.testing:6443
この最後に出てくる情報はメモしておいてください。
oc コマンドはよく使いますので、PATH を設定しておくと便利です。
[sugimura@toptonpc crc-linux-1.23.1-amd64]$ echo "eval $(~/crc-linux-1.23.1-amd64/crc oc-env)" > ~/.bash_profile
[sugimura@toptonpc crc-linux-1.23.1-amd64]$ source ~/.bash_profile
[sugimura@toptonpc crc-linux-1.23.1-amd64]$ which oc
~/.crc/bin/oc/oc
[sugimura@toptonpc crc-linux-1.23.1-amd64]$ oc version
Client Version: 4.7.0
Server Version: 4.7.0
Kubernetes Version: v1.20.0+bd9e442
これで使えるようになりましたが、そのままではこの RHEL 上でしか CRC を使うことができません。外からアクセスするための設定もいくつか実施しておきます。
この RHEL で haproxy を動作させて、外からの通信を CRC の中に中継していくというものです。
[sugimura@toptonpc ~]$ sudo dnf install haproxy policycoreutils-python-utils jq

[sugimura@toptonpc ~]$ sudo systemctl start firewalld
[sugimura@toptonpc ~]$ sudo firewall-cmd --add-port=80/tcp --permanent
success
[sugimura@toptonpc ~]$ sudo firewall-cmd --add-port=6443/tcp --permanent
success
[sugimura@toptonpc ~]$ sudo firewall-cmd --add-port=443/tcp --permanent
success
[sugimura@toptonpc ~]$ sudo systemctl restart firewalld
[sugimura@toptonpc ~]$ sudo semanage port -a -t http_port_t -p tcp 6443
[sugimura@toptonpc ~]$ sudo cp /etc/haproxy/haproxy.cfg{,.bak}
[sugimura@toptonpc ~]$ export CRC_IP=$(crc-linux-1.23.1-amd64/crc ip)
[sugimura@toptonpc ~]$ echo $CRC_IP
192.168.130.11

[sugimura@toptonpc ~]$ sudo tee /etc/haproxy/haproxy.cfg &>/dev/null <<EOF
global
    debug

defaults
    log global
    mode http
    timeout connect 5000
    timeout client 500000
    timeout server 500000

frontend apps
    bind 0.0.0.0:80
    option tcplog
    mode tcp
    default_backend apps

frontend apps_ssl
    bind 0.0.0.0:443
    option tcplog
    mode tcp
    default_backend apps_ssl

backend apps
    mode tcp
    balance roundrobin
    server webserver1 $CRC_IP:80 check

backend apps_ssl
    mode tcp
    balance roundrobin
    option ssl-hello-chk
    server webserver1 $CRC_IP:443 check

frontend api
    bind 0.0.0.0:6443
    option tcplog
    mode tcp
    default_backend api

backend api
    mode tcp
    balance roundrobin
    option ssl-hello-chk
    server webserver1 $CRC_IP:6443 check
EOF

[sugimura@toptonpc ~]$ sudo systemctl enable haproxy
[sugimura@toptonpc ~]$ sudo systemctl start haproxy
また、FQDN でアクセスできるようにする必要があります。DNS を設定して、apps-crc.testing と api.crc.testing がこの RHEL に向くようにしてください。dnsmasq が動作している DNS (192.168.0.93) ではこのように設定を追加しました。
# cat /etc/dnsmasq.d/crc.testing.conf
address=/apps-crc.testing/192.168.0.6
address=/api.crc.testing/192.168.0.6

# systemctl restart dnsmasq
これで使うための設定は終わりですが、この CRC の VM から外に通信することができず、一度再起動する必要がありました。
[sugimura@toptonpc ~]$ sudo shutdown -r now
再起動して OS がまた上がってきたら、crc start をやり直してください。
[sugimura@toptonpc ~]$ cd crc-linux-1.23.1-amd64/
[sugimura@toptonpc crc-linux-1.23.1-amd64]$ ./crc start
Web ブラウザからアクセス
./crc start したときに最後に表示された URL にアクセスすることで、CRC のコンロール画面が開きます。
https://console-openshift-console.apps-crc.testing
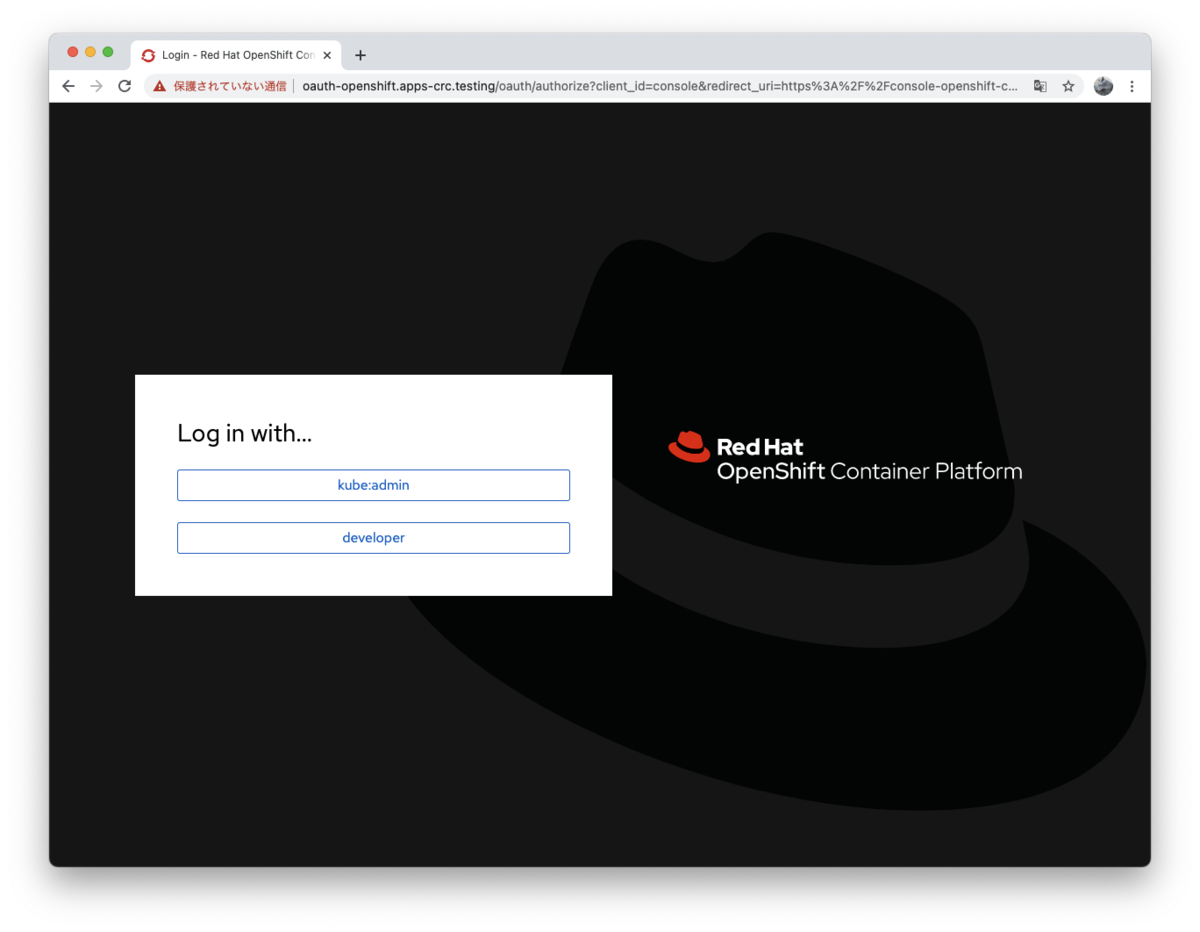
kube:admin をクリックして、kubeadmin でログインしてみます。
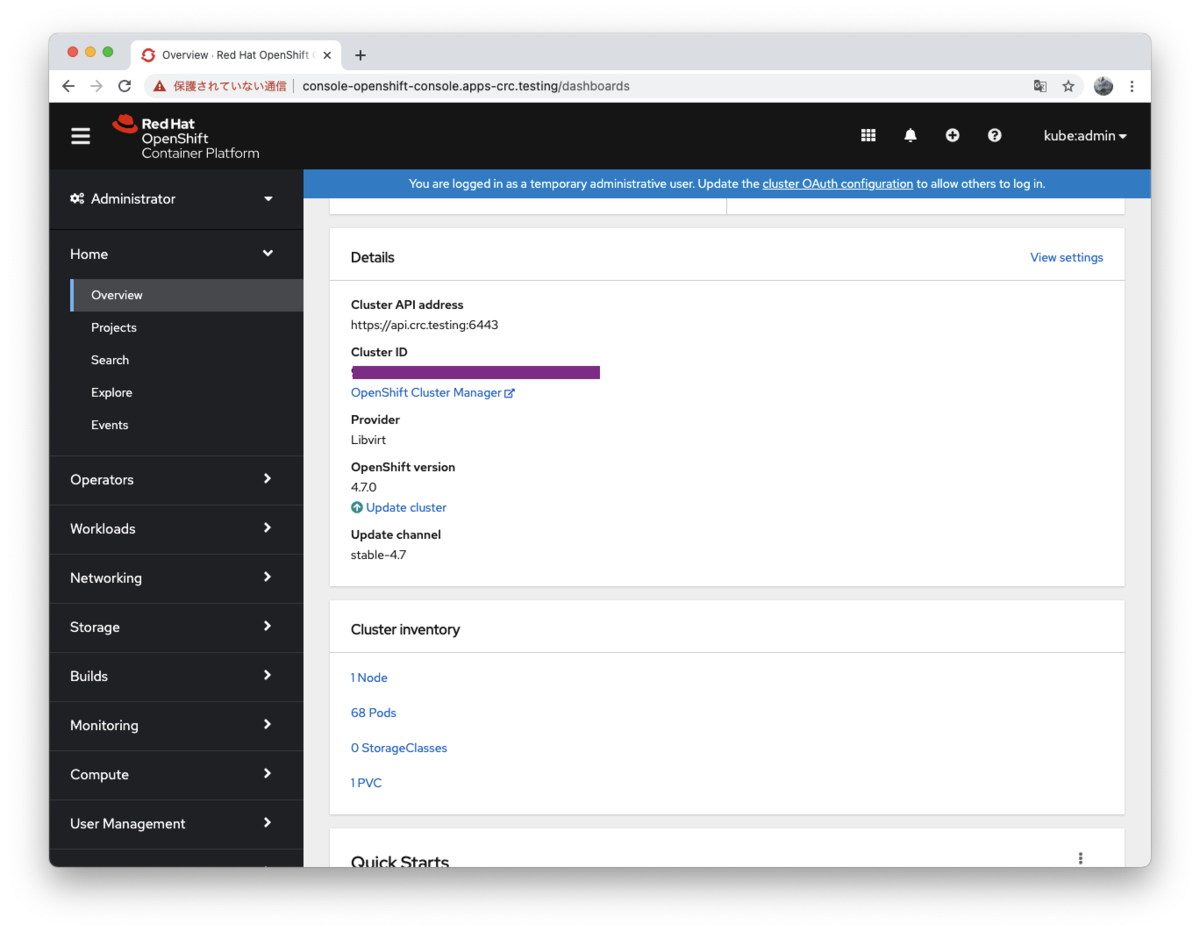
monitoring がないからなのかリソースの情報は表示されませんが、OpenShift 4.7.0 が動いていることがわかります。ブラウザの設定が日本語になっているときは、日本語でも表示されるようになりました。

こちらの記事もご参照ください。
これでこの Web コンソールや oc コマンドから、OpenShift を使うことができます。
Ansible Tower のインストール
ようやく本題なのですが、この CRC に Ansible Tower の現時点での最新版 3.8.2 をインストールしてみました。ドキュメントはこちらです。日本語版ドキュメントは翻訳の都合で 3.8.1 になっていますが、3.8.2 でも同様です。
PostgreSQL データベースのインストールはいくつかの方法があります。
- 外部に用意する (お勧め)
- OpenShift の永続ボリュームを使って設定
- OpenShift の一時ボリュームを使って設定
今回はお試しなので、簡単にインストールできる方法の一時ボリュームを使って設定することにします。
RHEL 8.3 上に Tower のインストーラを展開したら、inventory ファイルを設定します。
#localhost ansible_connection=local ansible_python_interpreter="/usr/bin/env python"
localhost ansible_connection=local ansible_python_interpreter=/usr/libexec/platform-python

[all:vars]

admin_user=admin
admin_password='XXXXXXXX'
secret_key='XXXXXXXX'

pg_username='awx'
pg_password='XXXXXXXX'
pg_database='tower'
pg_port=5432
pg_sslmode='prefer'  # set to 'verify-full' for client-side enforced SSL

openshift_host=https://api.crc.testing:6443
openshift_skip_tls_verify=true
openshift_project=tower
openshift_user=kubeadmin
openshift_password=XXXXXXXXXXXXXXXXXXXXXXXX

openshift_pg_emptydir=true
この CRC 環境では、特にこの2つの値はこのように設定しないと動きませんのでご注意ください。
openshift_host=https://api.crc.testing:6443
openshift_skip_tls_verify=true
あとは setup_openshift.sh を実行します。
[sugimura@toptonpc ansible-tower-openshift-setup-3.8.2-1]$ ./setup_openshift.sh
OpenShift としては tower プロジェクトとして設定されます。oc コマンドや Web UI から確認してみてください。
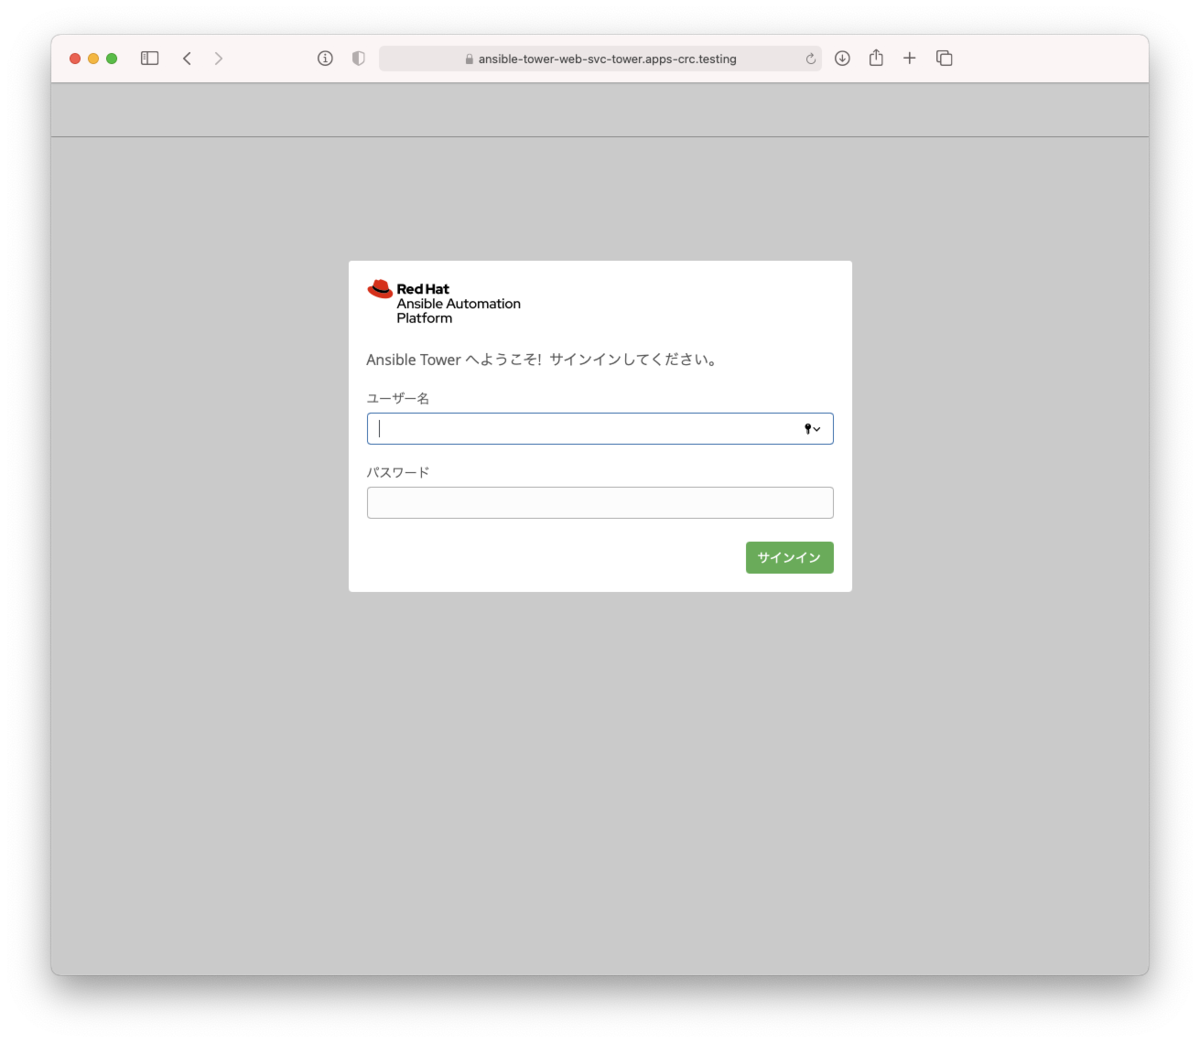
[sugimura@toptonpc ~]$ oc login -u kubeadmin https://api.crc.testing:6443
Authentication required for https://api.crc.testing:6443 (openshift)
Username: kubeadmin
Password:
Login successful.

You have access to 64 projects, the list has been suppressed. You can list all projects with 'oc projects'

Using project "mkdocs-dev".
[sugimura@toptonpc ~]$ oc get all -n tower
NAME                                 READY   STATUS      RESTARTS   AGE
pod/ansible-tower-786dcc67d8-7r6nb   3/3     Running     0          22h
pod/postgresql-1-deploy              0/1     Completed   0          22h
pod/postgresql-1-vl7rp               1/1     Running     0          22h

NAME                                 DESIRED   CURRENT   READY   AGE
replicationcontroller/postgresql-1   1         1         1       22h

NAME                            TYPE        CLUSTER-IP     EXTERNAL-IP   PORT(S)        AGE
service/ansible-tower-web-svc   NodePort    10.217.4.39    <none>        80:30695/TCP   22h
service/postgresql              ClusterIP   10.217.4.148   <none>        5432/TCP       22h

NAME                            READY   UP-TO-DATE   AVAILABLE   AGE
deployment.apps/ansible-tower   1/1     1            1           22h

NAME                                       DESIRED   CURRENT   READY   AGE
replicaset.apps/ansible-tower-786dcc67d8   1         1         1       22h

NAME                                            REVISION   DESIRED   CURRENT   TRIGGERED BY
deploymentconfig.apps.openshift.io/postgresql   1          1         1         config

NAME                                             HOST/PORT                                      PATH   SERVICES                PORT   TERMINATION     WILDCARD
route.route.openshift.io/ansible-tower-web-svc   ansible-tower-web-svc-tower.apps-crc.testing          ansible-tower-web-svc   http   edge/Redirect   None
[sugimura@toptonpc ~]$
ここに出ているように、https://ansible-tower-web-svc-tower.apps-crc.testing/ にアクセスすると Ansible Tower のログイン画面が出てきます。あとはオンプレミス版と同じように、ライセンス情報を投入すれば使うことができます。
OpenShift のデプロイメントから Pod をスケールアウトすることで動的にノード数を拡張したりすることはできますが、OpenShift 版の Tower には制限がありまして、isolated node はご利用いただくことができません。
CRC 環境のデバッグ
CRC の動きがなにかおかしいというときには、いくつか調査するための方法があります。
情報収集
[sugimura@toptonpc crc-linux-1.23.1-amd64]$ ./crc version
CodeReady Containers version: 1.23.1+be17b141
OpenShift version: 4.7.0 (embedded in executable)
[sugimura@toptonpc crc-linux-1.23.1-amd64]$ ./crc status --log-level debug
DEBU CodeReady Containers version: 1.23.1+be17b141
DEBU OpenShift version: 4.7.0 (embedded in executable)
DEBU Running 'crc status'
DEBU Checking file: /home/sugimura/.crc/machines/crc/.crc-exist
DEBU Checking file: /home/sugimura/.crc/machines/crc/.crc-exist
DEBU Found binary path at /home/sugimura/.crc/bin/crc-driver-libvirt
DEBU Launching plugin server for driver libvirt
DEBU Plugin server listening at address 127.0.0.1:38205
DEBU () Calling .GetVersion
DEBU Using API Version 1
DEBU () Calling .SetConfigRaw
DEBU () Calling .GetMachineName
DEBU (crc) Calling .GetState
DEBU (crc) DBG | time="2021-03-14T16:32:46+09:00" level=debug msg="Getting current state..."
DEBU (crc) DBG | time="2021-03-14T16:32:46+09:00" level=debug msg="Fetching VM..."
DEBU (crc) Calling .GetBundleName
DEBU (crc) Calling .GetIP
DEBU (crc) DBG | time="2021-03-14T16:32:46+09:00" level=debug msg="GetIP called for crc"
DEBU (crc) DBG | time="2021-03-14T16:32:46+09:00" level=debug msg="Getting current state..."
DEBU (crc) DBG | time="2021-03-14T16:32:46+09:00" level=debug msg="IP address: 192.168.130.11"
DEBU Running SSH command: df -B1 --output=size,used,target /sysroot | tail -1
DEBU Using ssh private keys: [/home/sugimura/.crc/machines/crc/id_ecdsa]
DEBU SSH command results: err: <nil>, output: 32737570816 16375975936 /sysroot
DEBU Running private SSH command
DEBU SSH command succeeded
DEBU Unexpected operator status for network: ManagementStateDegraded
DEBU Making call to close driver server
DEBU (crc) Calling .Close
DEBU Successfully made call to close driver server
DEBU Making call to close connection to plugin binary
CRC VM:          Running
OpenShift:       Running (v4.7.0)
Disk Usage:      16.38GB of 32.74GB (Inside the CRC VM)
Cache Usage:     13.01GB
Cache Directory: /home/sugimura/.crc/cacheDEBU (crc) DBG | time="2021-03-14T16:32:47+09:00" level=debug msg="Closing plugin on server side"
[sugimura@toptonpc crc-linux-1.23.1-amd64]$ ./crc config view
- consent-telemetry                     : no
- cpus                                  : 10
- memory                                : 49152
- nameserver                            : 192.168.0.93
- pull-secret-file                      : /home/sugimura/pull-secret.json
VM の中に入る
[sugimura@toptonpc crc-linux-1.23.1-amd64]$ export CRC_IP=$(./crc ip)
[sugimura@toptonpc crc-linux-1.23.1-amd64]$ ssh -i ~/.crc/machines/crc/id_ecdsa core@$CRC_IP
Red Hat Enterprise Linux CoreOS 47.83.202102090044-0
  Part of OpenShift 4.7, RHCOS is a Kubernetes native operating system
  managed by the Machine Config Operator (`clusteroperator/machine-config`).

WARNING: Direct SSH access to machines is not recommended; instead,
make configuration changes via `machineconfig` objects:
  https://docs.openshift.com/container-platform/4.7/architecture/architecture-rhcos.html

---
Last login: Sun Mar 14 07:35:09 2021 from 192.168.130.1
[core@crc-l6qvn-master-0 ~]$
おわりに
CRC (Red Hat CodeReady Containers) についてインストールするところから、Ansible Tower のインストールを通して OpenShift として使ってみるというところまで紹介してみました。ご興味持たれましたらお手元でも同じように試していただけましたらと思います。
Ansible Towerの評価ライセンスリクエストはこちらからご利用いただけます。
Happy Automation!